
Recently, we had the challenge of deploying a (simple) Spring Boot REST web service to an IBM WebSphere (Full Profile / WAS Classic) running on z/OS. Although only accessible in a local intranet, the web service should be protected against unauthorized use and only be available to certain RACF groups. Thus, it seemed obvious to use WebSphere’s built-in security mechanisms which allow user authentification against RACF (local registry).
However, there is not much documentation available on how these two work together. After some research, we discovered an old entry in the IBM developerworks community from 2010 titled “Using Spring and Hibernate with WebSphere Application Server” which also talked about security. The take-away from the post was that only using default Spring security (which replaces J2EE container security) would not allow to take advantage of the built-in WebSphere security. Also, the entry strongly discouraged using WebSphere’s JAAS authentification provider directly from spring (“… As a result, because the WebSphere Application Server login module in question is not intended to be used this way, using it directly in the manner described has unpredictable consequences. Moreover, users implementing this approach have encountered serious performance issues…”). Thus, the most viable approach seems to be using J2EE container security and configuring Spring Boot to utilize it.
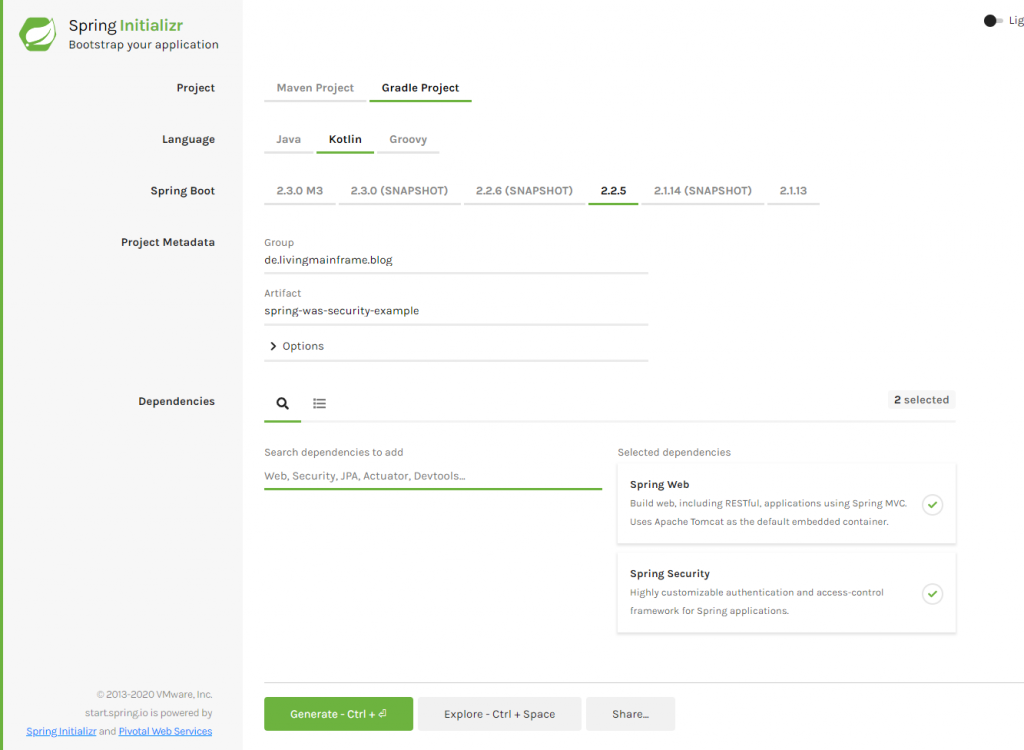
We start by creating a small demo application using Spring Initializr (in this case chosing Gradle and Kotlin – although maven and java should also work perfectly fine). We also add “Spring Web” and “Spring Security” dependencies:
We then add a very simple REST controller with two methods:
@RestController
@RequestMapping("/", produces=["text/plain"])
class TestController {
    @GetMapping("hello")
    fun sayHello(): String {
        return "Hello World"
    }
}
In order for our application to work inside the WebSphere Servlet container, we need to make some adjustments:
- Our Application needs to extend from SpringBootServletInitializer:
- We need to configure Spring Boot to use Servlet 3.1 (which WebSphere supports) rather then Servlet 4.0 (otherwise, you’ll receive an error message similar to “java.lang.NoSuchMethodError: javax.servlet.http.HttpServletRequest.getHttpServletMapping()Ljavax/servlet/http/HttpServletMapping;” (see stackoverflow: Spring boot: java.lang.NoSuchMethodError: javax.servlet.http.HttpServletRequest.getHttpServletMapping()Ljavax/servlet/http/HttpServletMapping for a discussion of the topic).
- A web.xml needs to be added
Our Application class now looks like this:
@SpringBootApplication
@EnableWebMvc
class SpringWasSecurityExampleApplication : SpringBootServletInitializer()
And our build.gradle.kts:
plugins {
   //...
   war
   //...
}
//...
extra["servlet-api.version"] = "3.1.0"
//...
dependencies {
   //...
   implementation("org.springframework.boot:spring-boot-starter-security")
   implementation("org.springframework.boot:spring-boot-starter-web") {
      exclude("org.springframework.boot", "spring-boot-starter-tomcat")
   }
   providedCompile("javax.servlet:javax.servlet-api:3.1.0")
}
//...
tasks.getByName<War>("war") {
   enabled = true
}
Now, we need to add a web.xml in the folder “src/main/webapp/WEB-INF/web.xml”:
<web-app xmlns="http://xmlns.jcp.org/xml/ns/javaee"
         xmlns:xsi="http://www.w3.org/2001/XMLSchema-instance"
         xsi:schemaLocation="http://xmlns.jcp.org/xml/ns/javaee
       http://xmlns.jcp.org/xml/ns/javaee/web-app_3_1.xsd"
         version="3.1">
    <security-role>
        <role-name>ROLE_USER</role-name>
    </security-role>
    <security-constraint>
        <web-resource-collection>
            <web-resource-name>Secured Areas</web-resource-name>
            <url-pattern>/*</url-pattern>
            <http-method-omission>OPTIONS</http-method-omission>
        </web-resource-collection>
    </security-constraint>
</web-app>
Note that we did not any auth-constraints to our web.xml. We still want to use Spring’s security to configure authorization. However, the web.xml is still required in order for our servlet container (i.e. WebSphere) to recognize the need to perform authentification and role mapping.
Next, we can configure Spring Security using a WebSecurityConfigurerAdapter to restrict access to any request to members of the “USER” role (which we will later map to RACF groups in WebSphere):
@Configuration
@EnableWebSecurity
class WebSecurityConfig : WebSecurityConfigurerAdapter() {
   override fun configure(http: HttpSecurity) {
      http.jee().mappableRoles("USER")
         .and().httpBasic()
         .and().authorizeRequests().anyRequest().hasRole("USER")
   }
}
We still need to specify httpBasic because otherwise, Spring will respond with a 403 – Forbidden instead of 401 – Unauthorized. Using the web.xml to specify auth-constraints would be an alternative (but will cause issues if we need CORS support as described later).
Our application is ready for deployment. Run gradle build to package it as a war file which can be deployed to WebSphere (look in the “build/libs” directory). After uploading the war and hitting “Next” a couple of time (the only required change you need to perform is entering a “Context Root” in Step 4), we still need to configure the role mapping. This setting is hidden in the configuration page of the application under “Security role to user/group mapping”:

Just check the checkbox in front of “ROLE_USER”, chose “Map Groups…” or “Map Users…” and specify which groups and users should be mapped to our USER role in Spring. Remember to save the configuration and (re-)start the application.
Using CURL, we can now test our application. First, without supplying a username / password resulting in a 401:
curl http://servername/springexample/hello
{"timestamp":1585141037418,"status":401,"error":"Unauthorized","message":"Unauthorized","path":"/springexample/hello"}
Next, with a user who is a member of the previously specified RACF group:
curl --user "USER:PASSWORD" http://servername/springexample/hello
Hello World
And next, a user who is not a member of the group:
curl --user "USER:PASSWORD" http://servername/springexample/hello
{"timestamp":1585141264355,"status":403,"error":"Forbidden","message":"Forbidden","path":"/springexample/hello"}
One final tweak is enabling CORS to allow usage of our REST service from browser apps (e.g. an Angular application). This can be achieved by adding a corsConfigurationSource Bean to the WebSecurityConfig and enabling cors as shown in stackoverflow: Spring security CORS Filter:
@Configuration
@EnableWebSecurity
class WebSecurityConfig : WebSecurityConfigurerAdapter() {
   override fun configure(http: HttpSecurity) {
      http.jee().mappableRoles("USER")
            .and().httpBasic()
            .and().authorizeRequests().anyRequest().hasRole("USER")
            .and().cors()
   }

   @Bean
   fun corsConfigurationSource(): CorsConfigurationSource {
      val configuration = CorsConfiguration()
      configuration.allowedOrigins = listOf("*")
      configuration.allowedMethods = listOf("GET")
      configuration.allowCredentials = true
      configuration.allowedHeaders = listOf("Authorization", "Cache-Control", "Content-Type")
      val source = UrlBasedCorsConfigurationSource()
      source.registerCorsConfiguration("/**", configuration)
      return source
   }
}
Note that you might want to limit the allowedOrigins further, e.g. using a configuration property. Also note that when using auth-constraints in the web.xml, the CORS headers won’t be added when authorization fails because the filters do not run when the servlet authentification fails.
We can check the result by using a slightly modified curl command with different users:
curl --user "USER:PASSWORD" -H "Origin: http://example.com" -v http://servername/springexample/hello
Note that the result should include the following two lines, even when the request is not successful due to missing authentification:
Access-Control-Allow-Origin: http://example.com
Access-Control-Allow-Credentials: true
We hope that this post might help others in a similar situation.
Bonus (not recommended): If you don’t want to use the security built into WebSphere, there is also the possibility to write a custom AuthentificationProvider for Spring which utilizes the RACF.jar delivered as part of the z/OS installation (use at your own risk – and does not check for group membership!):
@Configuration
@EnableWebSecurity
class CustomWebSecurityConfigurerAdapter : WebSecurityConfigurerAdapter() {
   //...
   override fun configure(builder: AuthenticationManagerBuilder) {
      builder.authenticationProvider(RacfAuthentificationProvider())
   }
}

class RacfAuthentificationProvider : AuthenticationProvider {
   override fun authenticate(authentication: Authentication?): Authentication {
      val username = authentication!!.name
      val password = authentication.credentials.toString()

      val result = PlatformUser.authenticate(username, password)
      if (result != null)
         return UsernamePasswordAuthenticationToken(authentication.name, authentication.credentials)

      return UsernamePasswordAuthenticationToken(authentication.name, authentication.credentials, listOf())
   }

   override fun supports(authentication: Class<*>?): Boolean {
      return authentication!! == UsernamePasswordAuthenticationToken::class.java
   }
}
Photo by Maxim Zhgulev on Unsplash